Showing posts with label Craft. Show all posts

Friday, March 8, 2013

Wood Pallet Fun

A few of us ladies have been working on a project for a little while. They are all over Pinterest these days. People doing crazy, cool things with old wooden pallets. So, we decided we would give it a shot.

Denise got a hold of a few old pallets, which we promptly tore a part and reassembled to look something like this...


 I had a hard time decided what exactly I wanted to do with my pallet. There are lots of people that put fun sayings or verses on them, but I couldn't settle on a saying or verse that I really wanted to put on there. And then one day I was on Pinterest and I saw this...

                                                                              Link

And I knew that's what I wanted to do, especially since my husband loves maps. So I found a vintage map poster on amazon for really cheap. I had to remake my pallet to fit the size specifications of the poster, and then I sanded and stained the pallet. The poster fit perfectly.


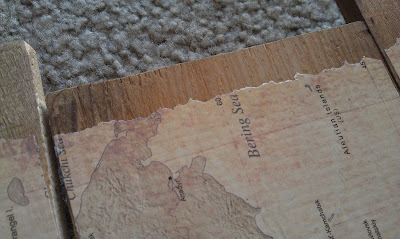
 I first started by tearing the sides of the poster to make them look more worn.


 Then I laid the poster on the pallet and used an little knife to slice the poster into pieces that fit each board of the pallet.


 Carefully, I created some wrinkles and small tears in each piece so that it would have the worn look I was looking for. Using Tacky Glue, I glued each panel of the poster to each panel of the pallet making sure the glue went all the way to each edge.


There were a few knots in the wood that I cut out from the poster.


For the last touch, I took matte Mod Podge (I used matte so that it wouldn't have any shine on it when completed) and sealed then entire surface. 

This finished product looks awesome. It's obviously different from that picture I originally found, but I am very happy with the outcome (and my husband also loves it).


Monday, July 23, 2012

Grocery Bag Holder

When I grocery shop I usually use my cloth shopping bags. I like them because they can hold more, they are sturdy, and I don't have to have a ton of the plastic grocery bags around my house.

On the other hand I occasionally forget to take my cloth bags or don't have them on me when I need to stop and pick something up from the grocery store on my way home from something. And having a few of those bags around the house is helpful for trash bags and other such things. But they tend to get unorganized quickly under my kitchen sink.

So I came up with a nice, compact solution.


A plastic Folders coffee container, which I turned upside down and cut a square and 4 slits in. 


Just stuff the bags in through the lid (I can stuff quite a few bags into this thing), seal, and turn upside down. It fits great under my sink!

Monday, June 4, 2012

Homemade Kindle Cover


I bought Eddie a Kindle Touch for Christmas last December. I wanted him to have a cover for it, but I didn't really have the extra $20 or $30 to spend on one nor did I think he would like one of the fancy covers. Plus I knew that one thing Eddie didn't like about Kindles is that you don't have the feel of holding a book. So I decided to make him a cover out of a book. Unfortunately I didn't take pictures from start to finish. But I have some of the finalized product. I think it turned out awesome!
 
I started with this little book that I got at a second hand store for about $1. I pre-measured it to make sure it would be the right size for his Kindle. Then I used a knife to take out the pages of the book leaving just the outer cover.
 I cut two slits in the back for an elastic strap, pulled the strap through the back cover and glued them to the inside.


I cut and sewed a piece of fabric to the size of the back and binding and then sewed elastic straps to the fabric. After the elastic straps were sewn on, I then glued the whole piece onto the inside of the back cover. For the inside of the front cover I glued a piece of felt to help keep the screen from getting scratched.


And there it is! Now Eddie can have the feel of holding a book and it offers plenty of protection for the Kindle.


Wednesday, May 23, 2012

Nalgene Cozy

For those that don't know, Phoenix gets really hot in the summer (never gets below 100 degrees, even at night). So, as I was thinking about ways to stay cool and hydrated, I wanted a way to keep the water in my Nalgene cold as long as possible. But I didn't want to buy a cozy for it, I wanted to make one. But most homemade cozies I found online were crocheted and I didn't want one like that because I knew it would just get soaked from the condensation on the bottle. So I came up with my own solution from a canvass lunch box! And it turned out perfect.
 Here is my canvass lunch box and my Nalgene.

The first step is to cut down both sides of the lunch box and across the bottom.

This is the remaining result.

Wrap it around the bottle to make sure it's the right size.

Then cut off the extra rounded end.


Turn inside out and pin together.

Do an extra check to make sure it fits snuggly, and then sew up the side.


And there it is! The finished product. And it even has a handle!